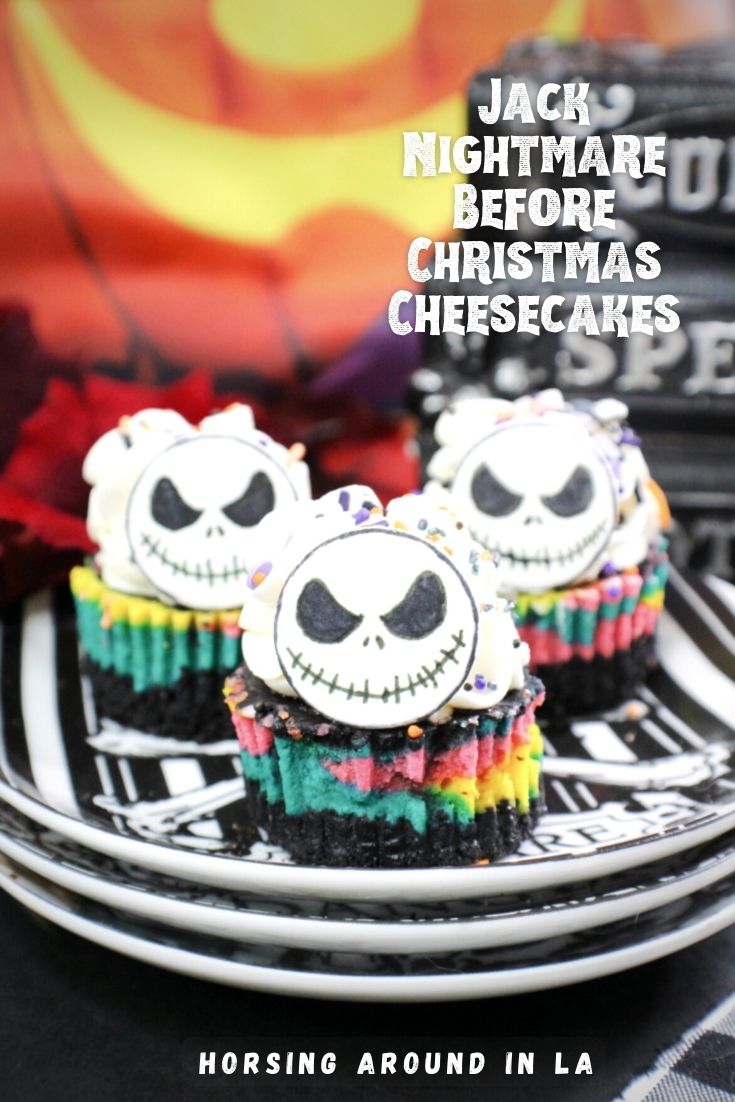
Jack Nightmare Before Christmas Cheesecakes
By Erin
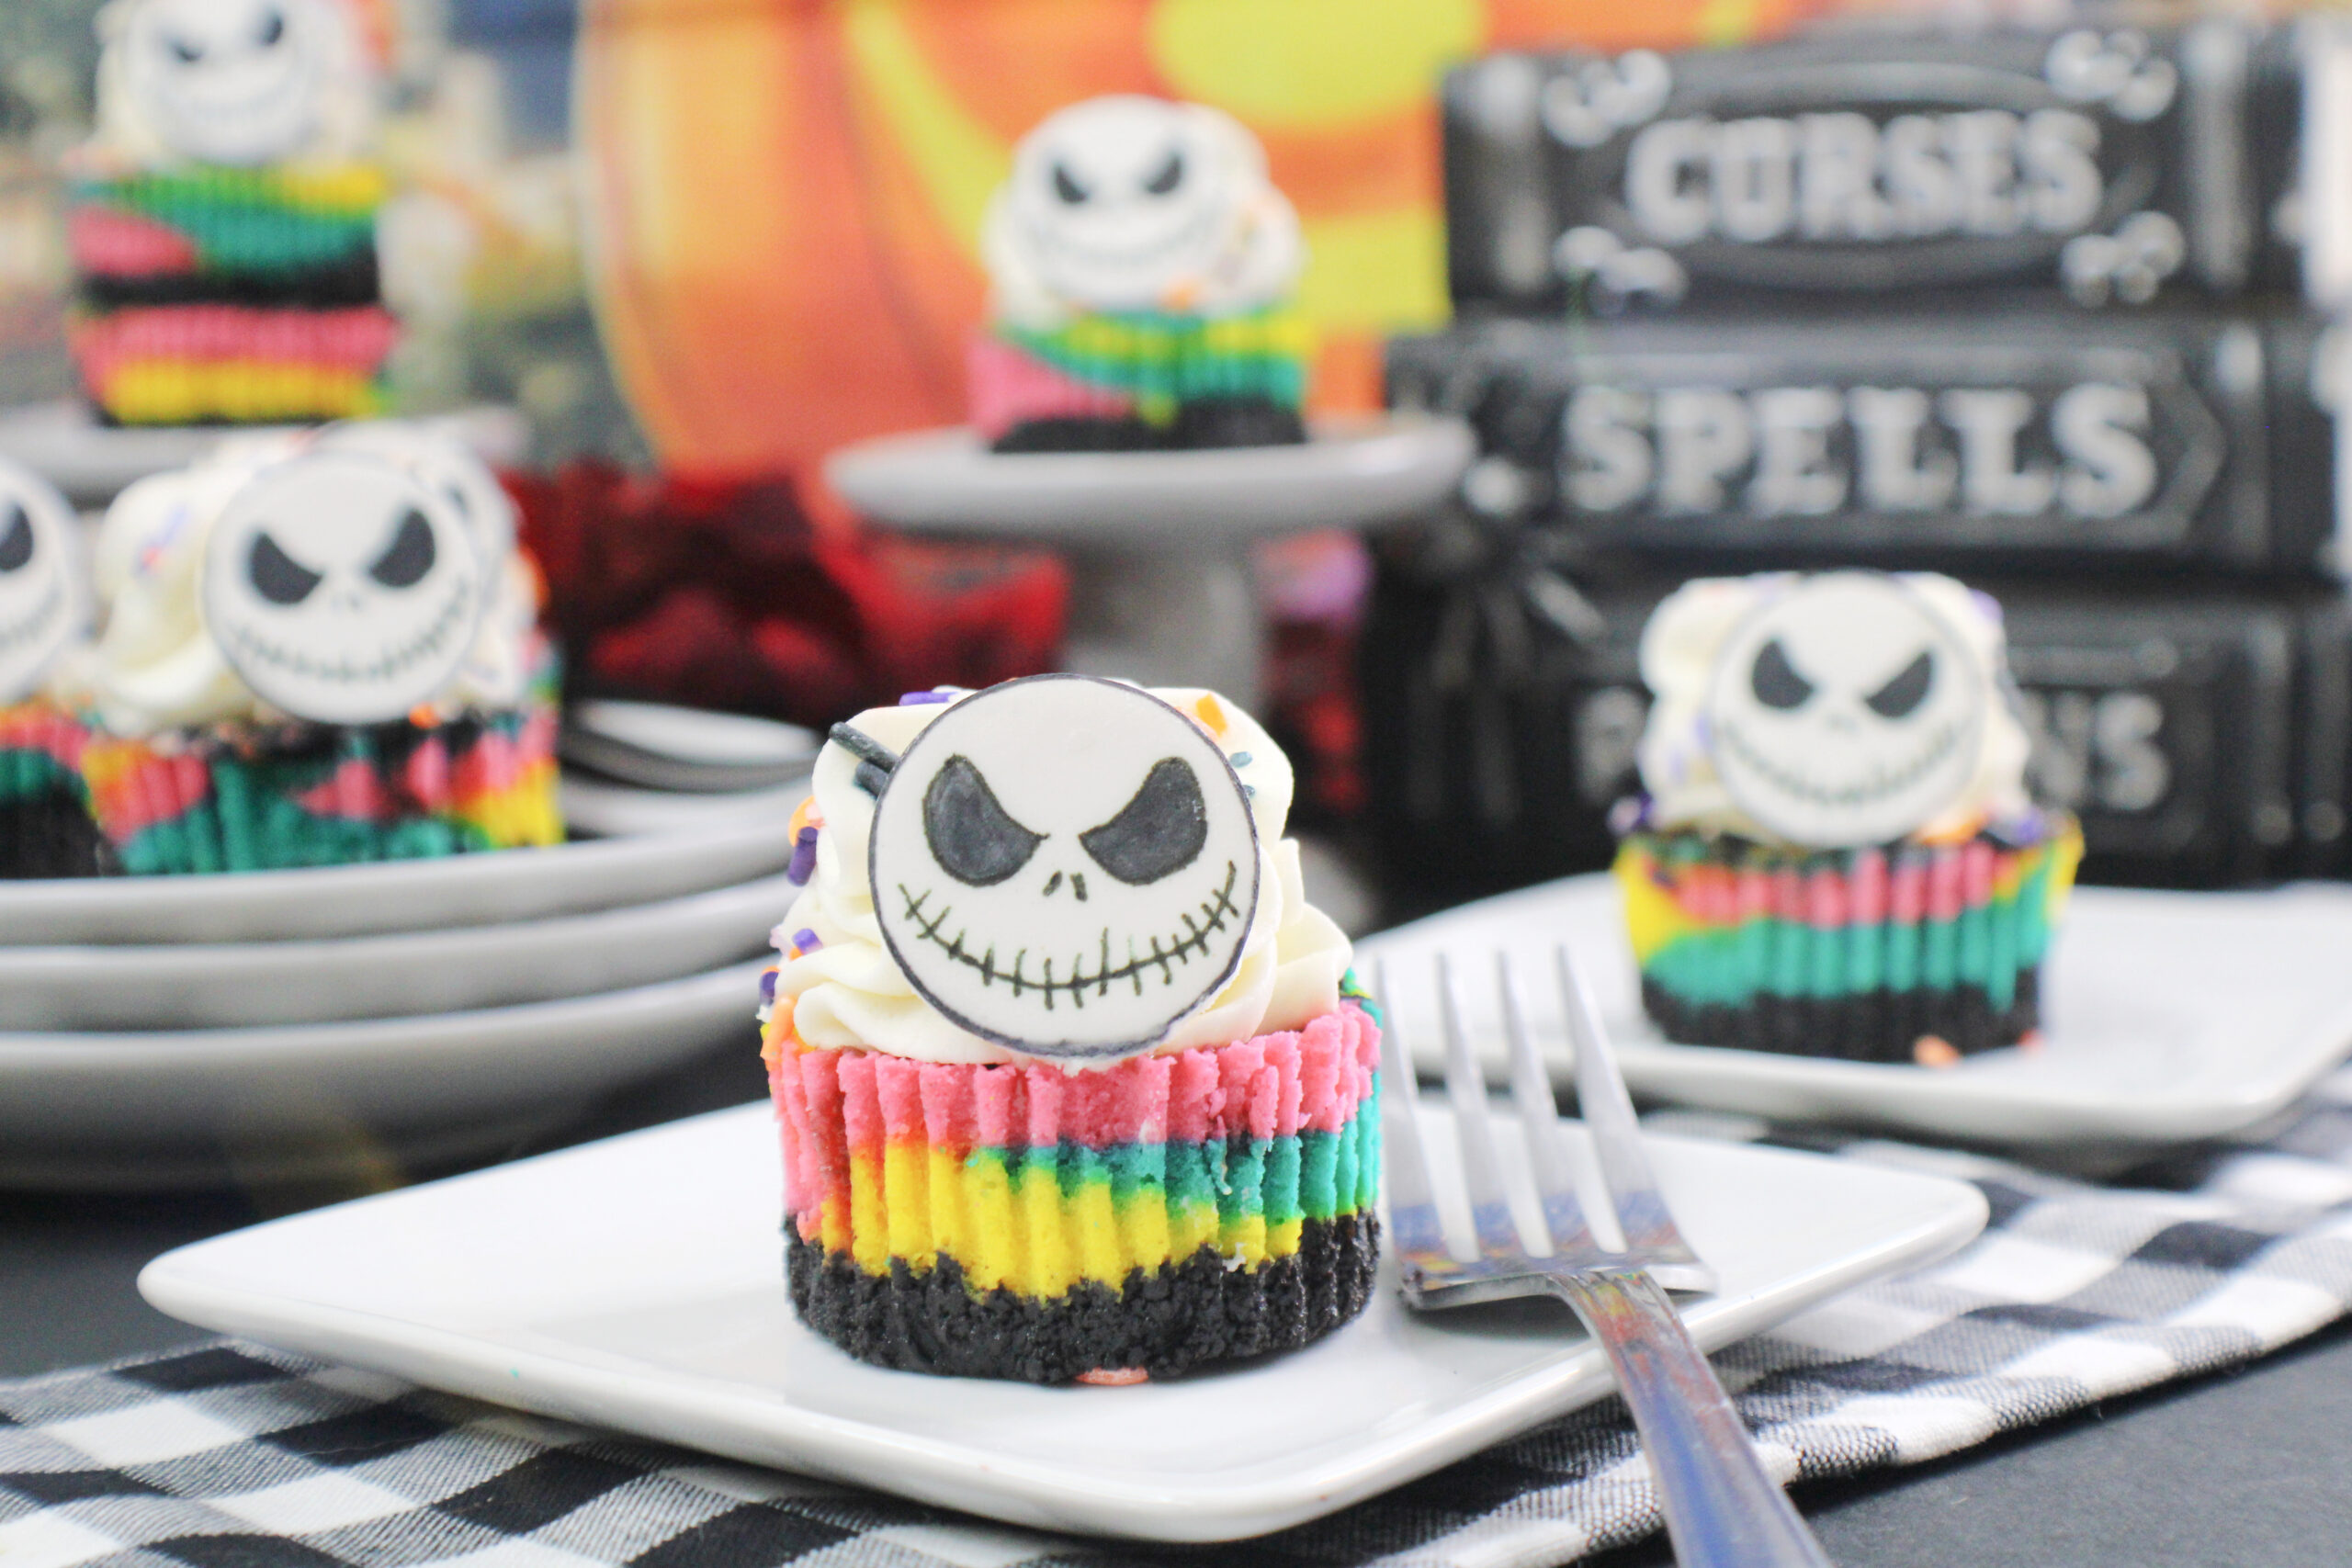
Ok so HOW cute are these Jack Skellington cheesecakes? Halloweentown’s beloved pumpkin king, is turned into a delicious Nightmare Before Christmas Cheesecake! Perfect to serve during spooky season, any Nightmare Before Christmas fan will get a kick out of these!
Makes 12 mini cheesecakes
Jack Fondant Piece
1 4 oz white fondant
1 black edible marker
1-2 inch circle fondant cutter Cornstarch
Directions
Follow directions on the back of the package to roll out the fondant. Cut out 12 circles and place onto a cookie sheet overnight. The next day, use the edible marker to draw on Jack Skellingtons face and set aside.
Crust Ingredients
1 package of oreo cookies, creme filling removed and finely crushed, 3 tablespoons of sugar
1⁄2 cup of butter, melted
Sally Cheesecake
2 – 8oz cream cheese, softened 2⁄3 cup sugar
1⁄4 cup sour cream
2 teaspoons of pure vanilla extract
2 large eggs
Teal, Pink, Neon Yellow and Black gel food coloring , Halloween sprinkles
Topping
Fresh whipped cream
Directions
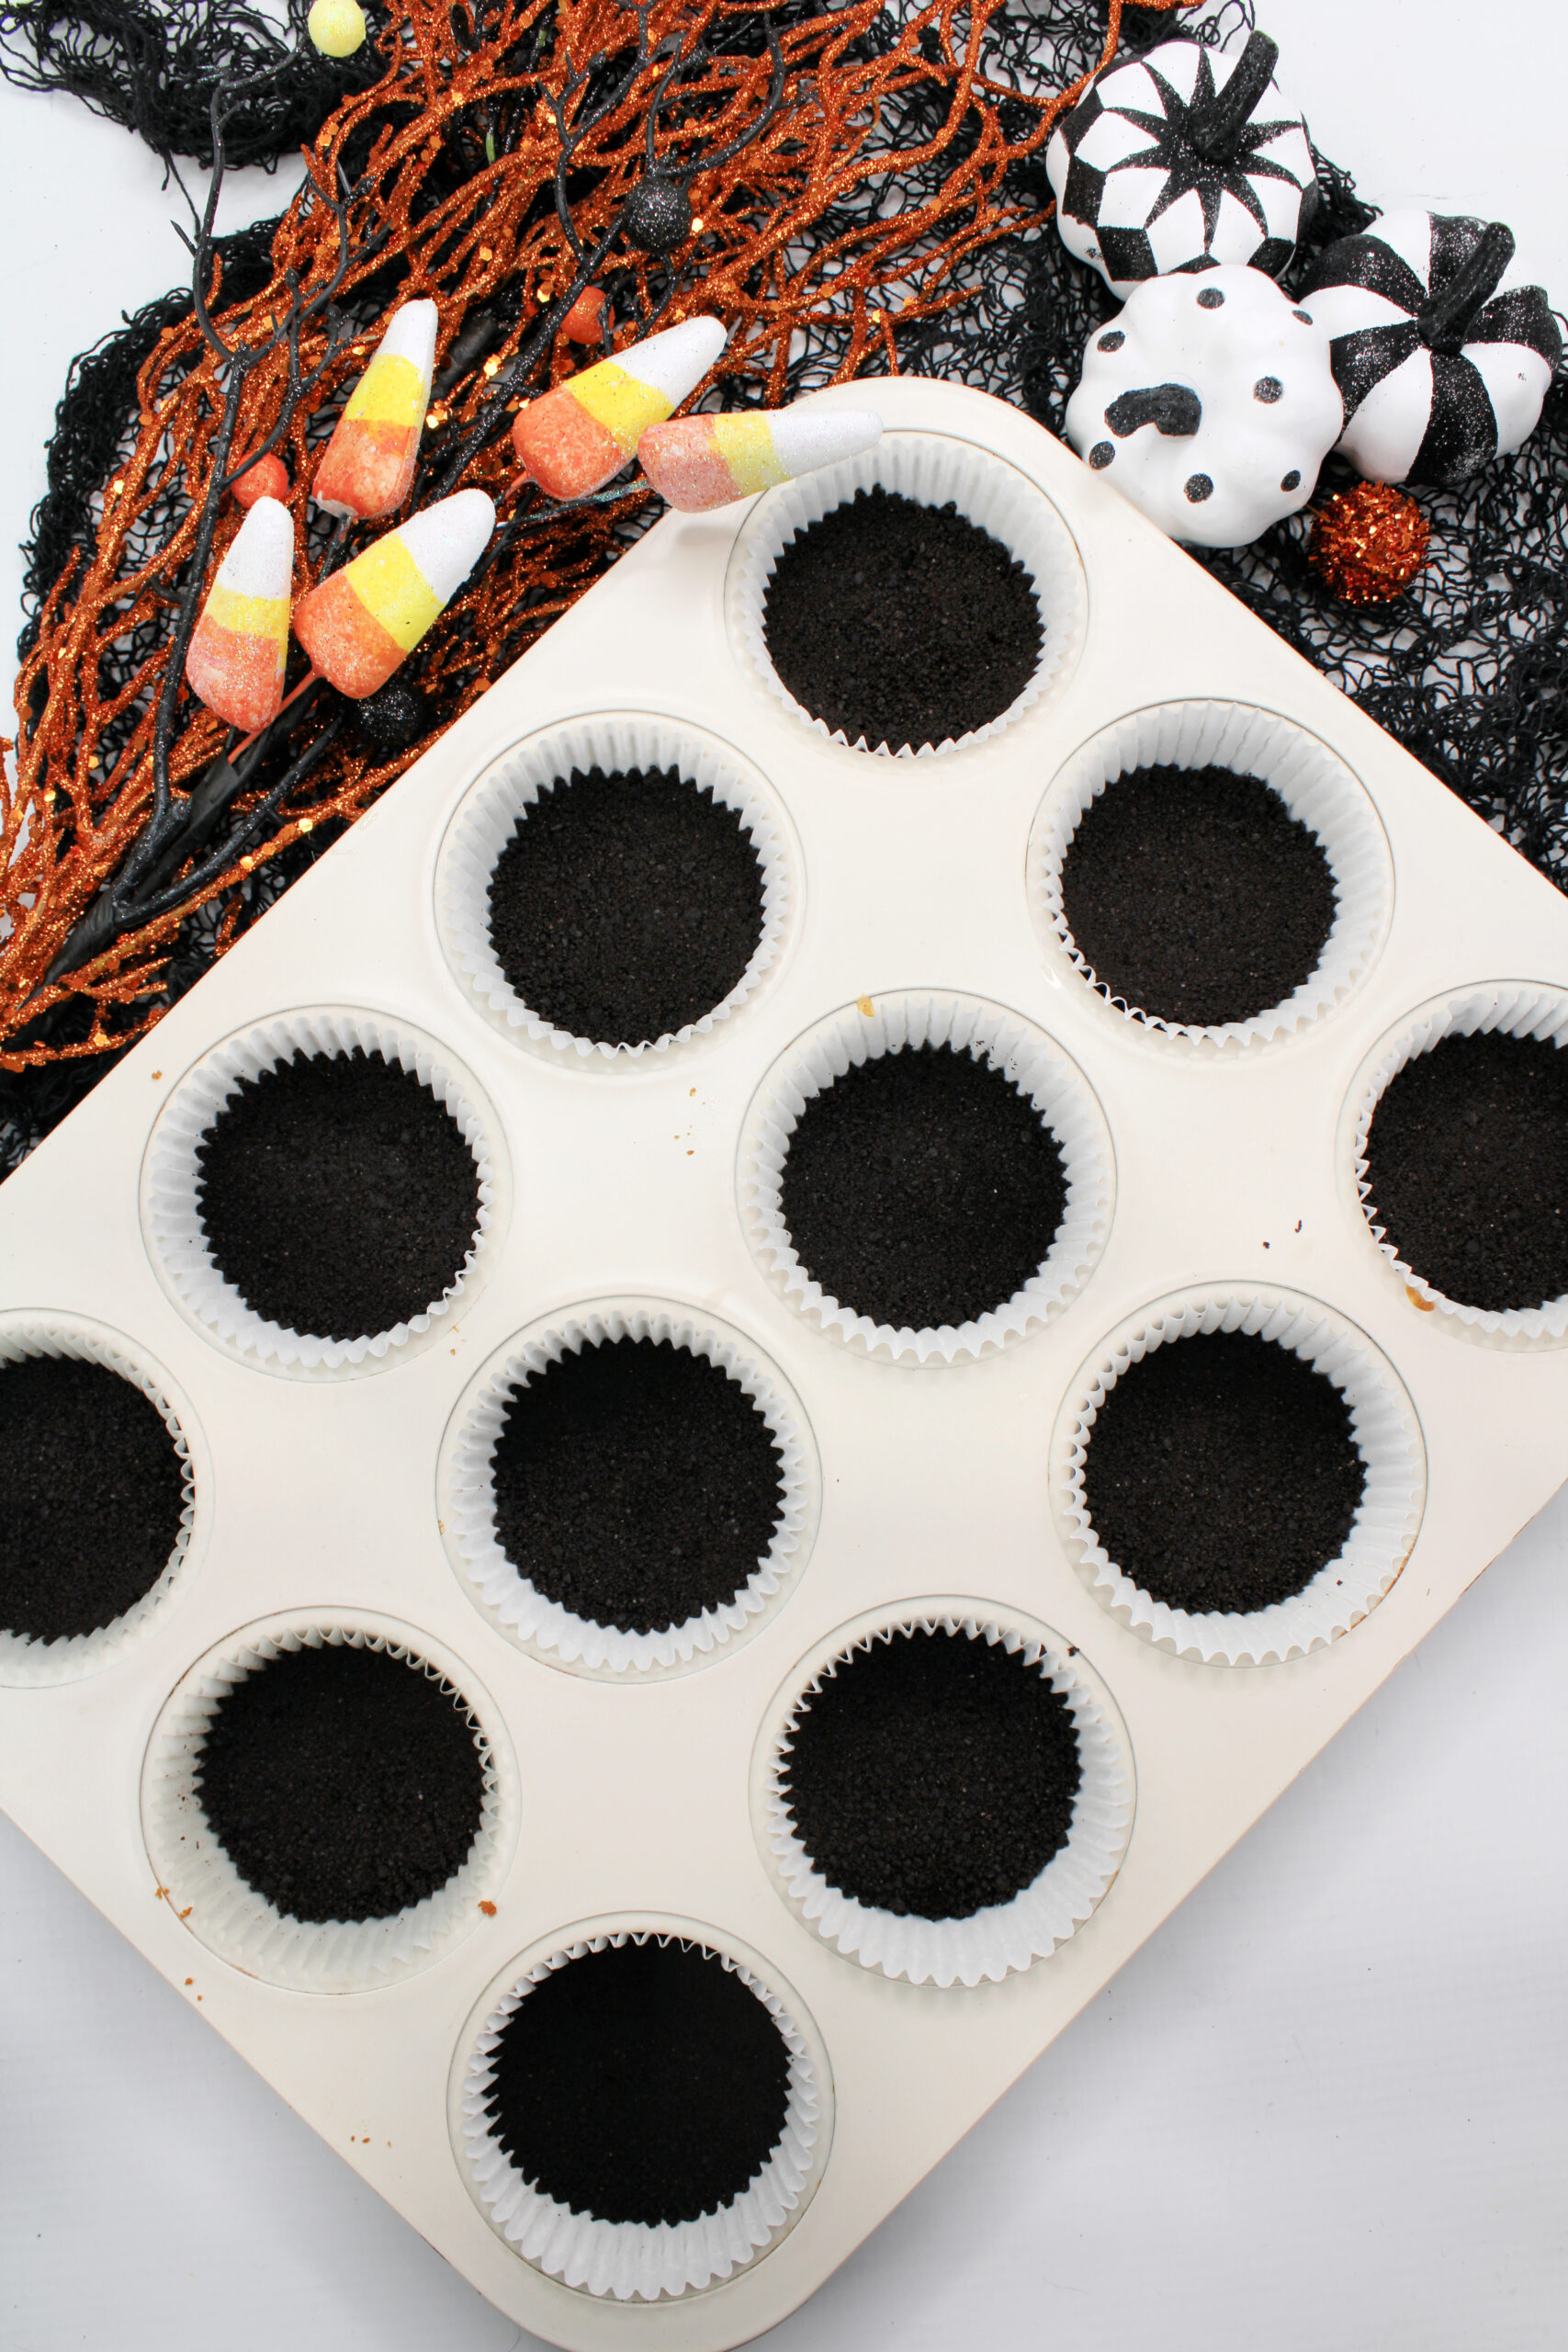
Preheat oven to 325 degrees and line the cupcake/muffin pan with the cupcake liners.
Using a medium bowl, whisk the oreo cookies, sugar and melted butter until a wet sandlike mixture forms.
Scoop 1 1⁄2 tablespoons of chocolate cookie crust into the cupcake liners and press into an even bottom using a flat bottom glass or measuring cup.
Bake the crust in the preheated oven for 5 minutes. Remove and allow to cool completely.
Preheat the oven to 350.
Using a large bowl, beat the cream cheese and sugar until combined and smooth. Beat in the sour cream and vanilla until combined and smooth.
One egg at a time, beat until combined.
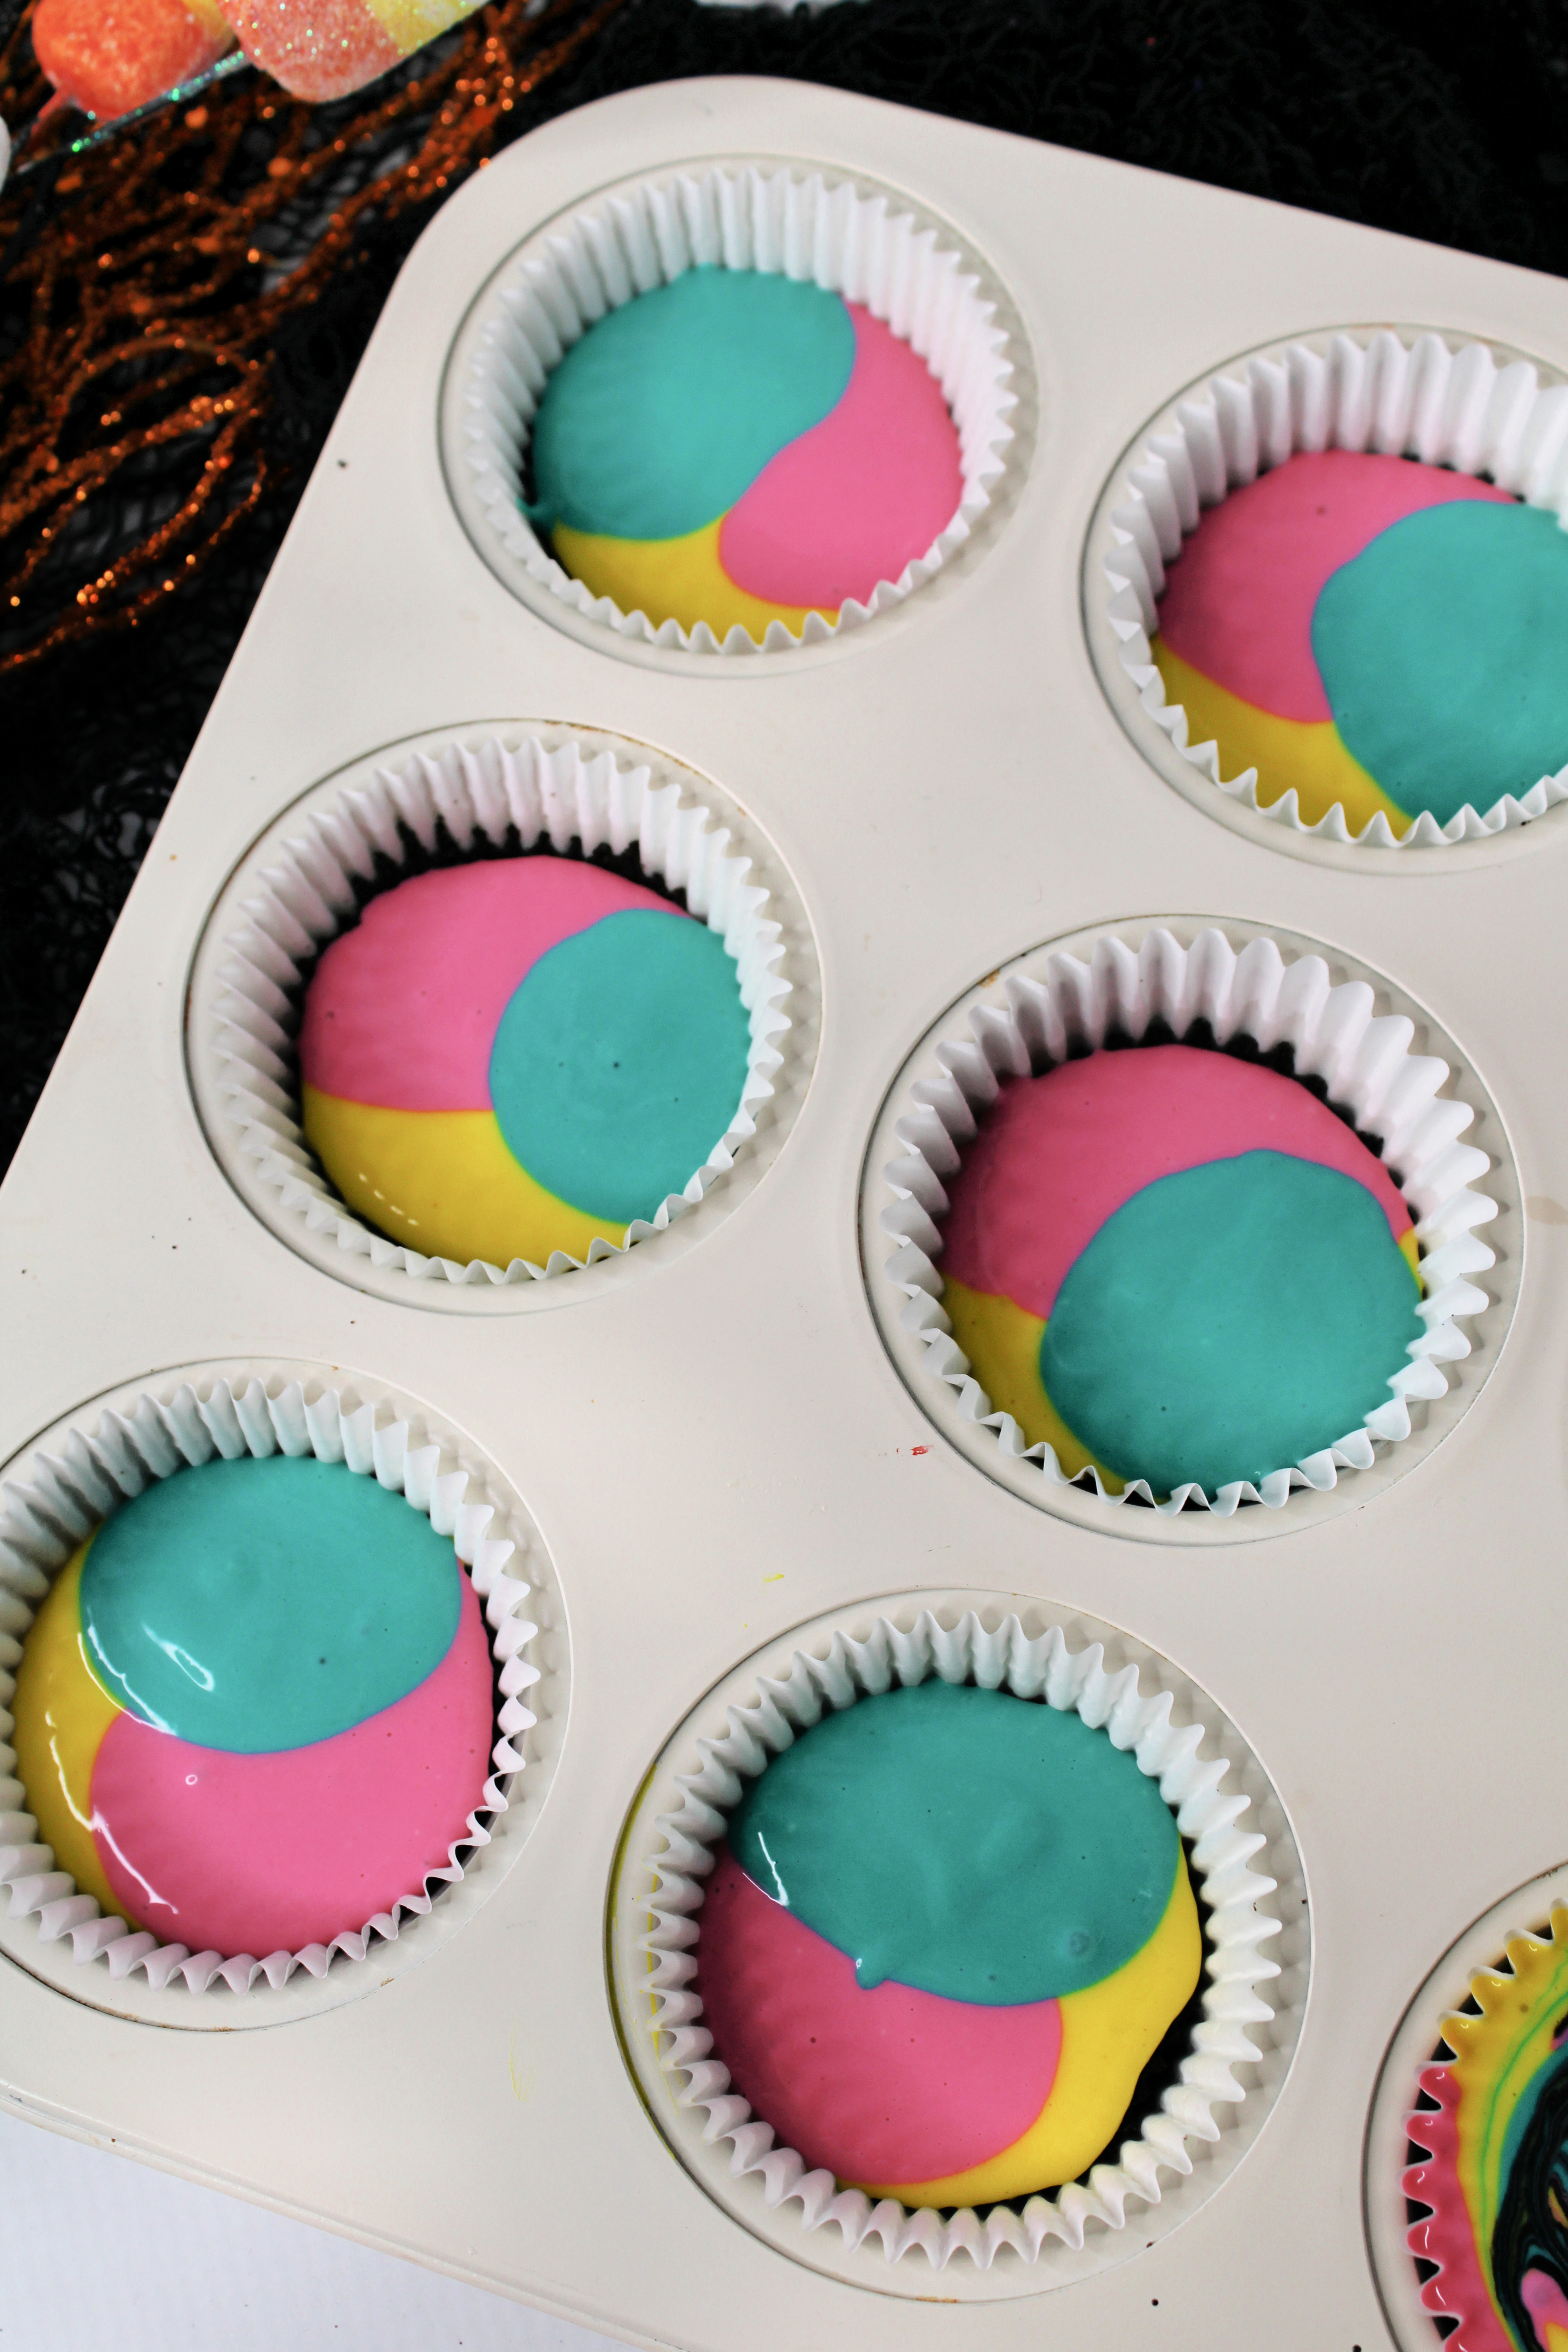
Divide the batter into four bowls,
Starting with the yellow, add in 1 tablespoon of the cheesecake batter into the crust.
Add in 1 tablespoon of the pink batter on top of the yellow batter.
Add in 1 tablespoon of the teal batter on top of the pink.
Add in 1 teaspoon of the black batter on top.
Use a toothpick and swirl the batter together.
Place into the oven and bake for 25-35 minutes or until the center is set!
Remove and allow to cool on the counter until room temp before moving to the fridge overnight.
Top with fresh whipped cream and halloween sprinkles and place a Jack fondant piece in the center of the whipped cream.
“My skull’s so full, it’s tearing me apart.” — Jack Skellington
Enjoy!