❄️✨ Snowflake Minnie Magic Cupcakes ✨❄️
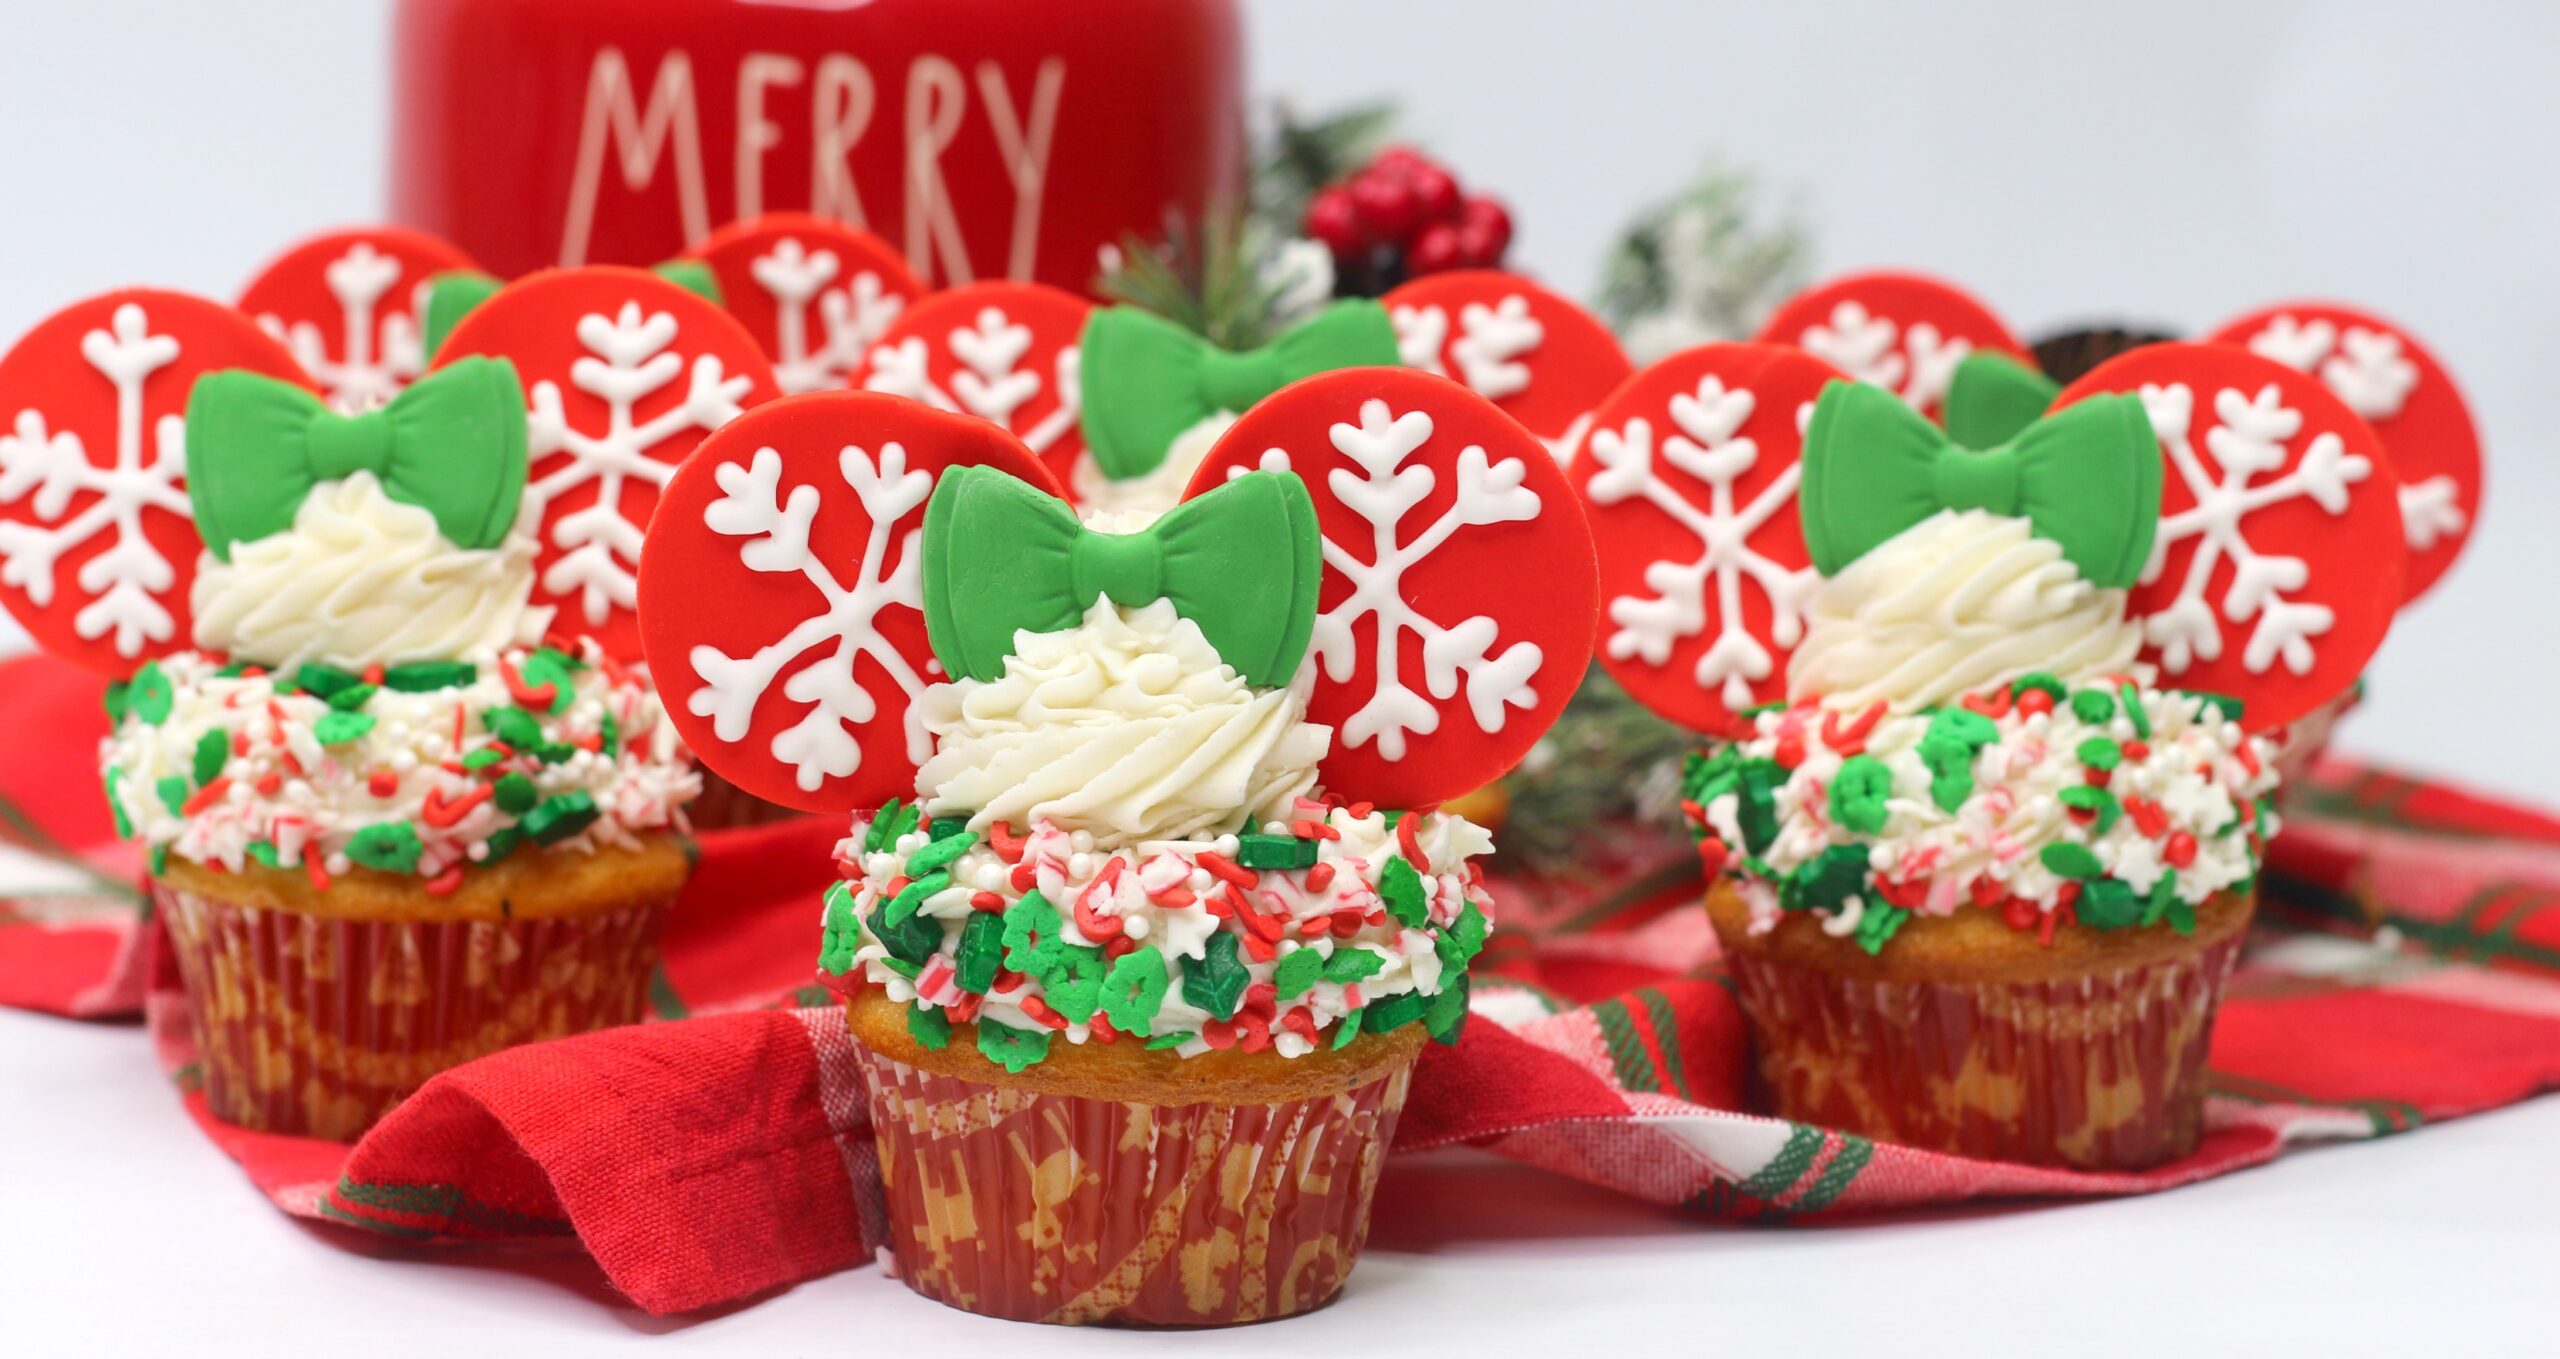
A holiday treat straight out of a winter wonderland with these Snowflake Minnie Ear Cupcakes!
By Erin
There’s something extra magical about holiday baking, especially when it involves sprinkles, snowflakes, and a little Disney-inspired charm. These Snowflake Minnie Ear Cupcakes are the perfect mix of festive and fun, bringing winter wonderland vibes straight to your kitchen. With sparkly snowflake ears, a bright green bow, and fluffy vanilla frosting, these cupcakes feel like they belong at a holiday party, a cozy movie night, or even Santa’s dessert table. Whether you’re baking with kids or just channeling your inner holiday magic, these cupcakes are guaranteed to bring smiles all around.
🧁 Snowflake Minnie Mouse Cupcakes Recipe
🐭 Fondant Ears & Bow Decorations
Ingredients
- 1 package red fondant
- 1 package green fondant
- 1 Wilton fondant bow mold
- 1 mini circle fondant cutter
- 1 Wilton white piping gel
- Powdered sugar (for dusting)
Directions
Prepare the Fondant (Day 1):
- Sprinkle powdered sugar onto a cutting board.
- Roll out the red fondant to about ¼-inch thickness.
- Use the mini circle cutter to cut out 48 red fondant circles for the ears.
- Set the circles aside and allow them to dry overnight.
Make the Bows:
- Dust your hands with powdered sugar.
- Roll the green fondant into a smooth ball.
- Pinch off 1 teaspoon-sized pieces and press them firmly into the larger bow mold.
- Make 22 bows and set them aside to dry overnight.
Decorate the Ears (Day 2):
- Using the white piping gel, pipe delicate snowflake designs onto each red fondant circle.
- Allow the designs to dry for a few hours before handling.